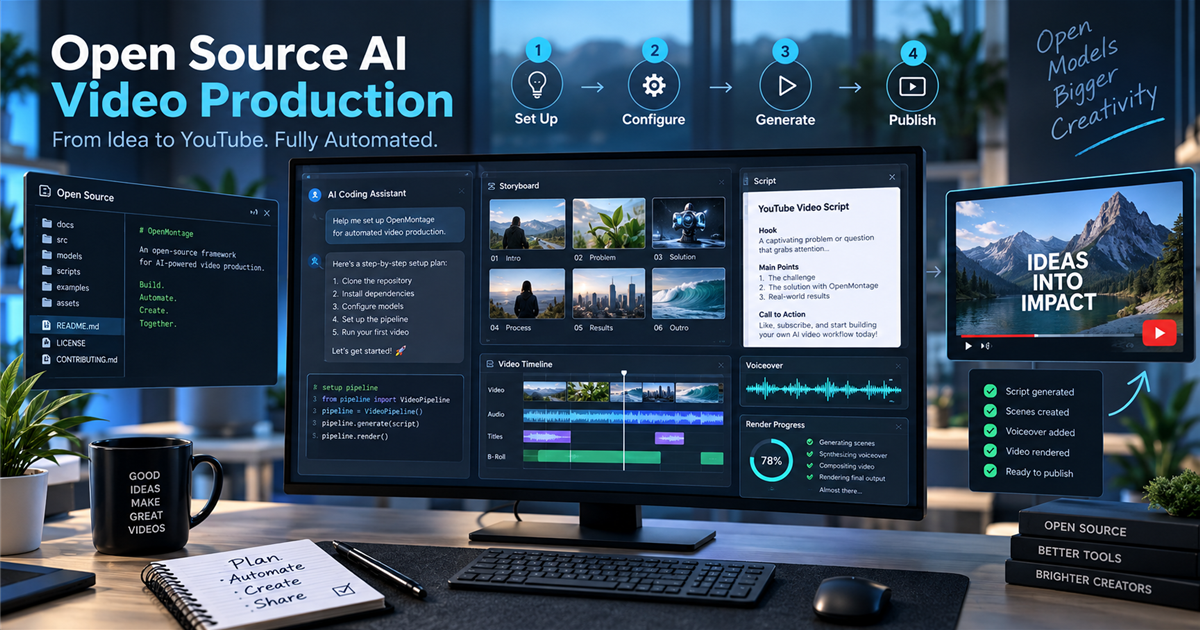
OpenMontage setup is for creators who want to test whether an open-source AI production system can turn one YouTube idea into a script, storyboard, assets, voiceover, edit, and final render. The realistic answer: OpenMontage can automate a lot of the production pipeline, but it still needs careful setup, provider choices, and human review before anything goes live.
Quick answer
OpenMontage is an open-source agentic video production system on GitHub. It works best when you install the project locally, connect only the media providers you need, give your AI coding assistant a clear video brief, then review the script, storyboard, assets, audio, captions, and render before publishing. Start with a short test video first.
What to know first
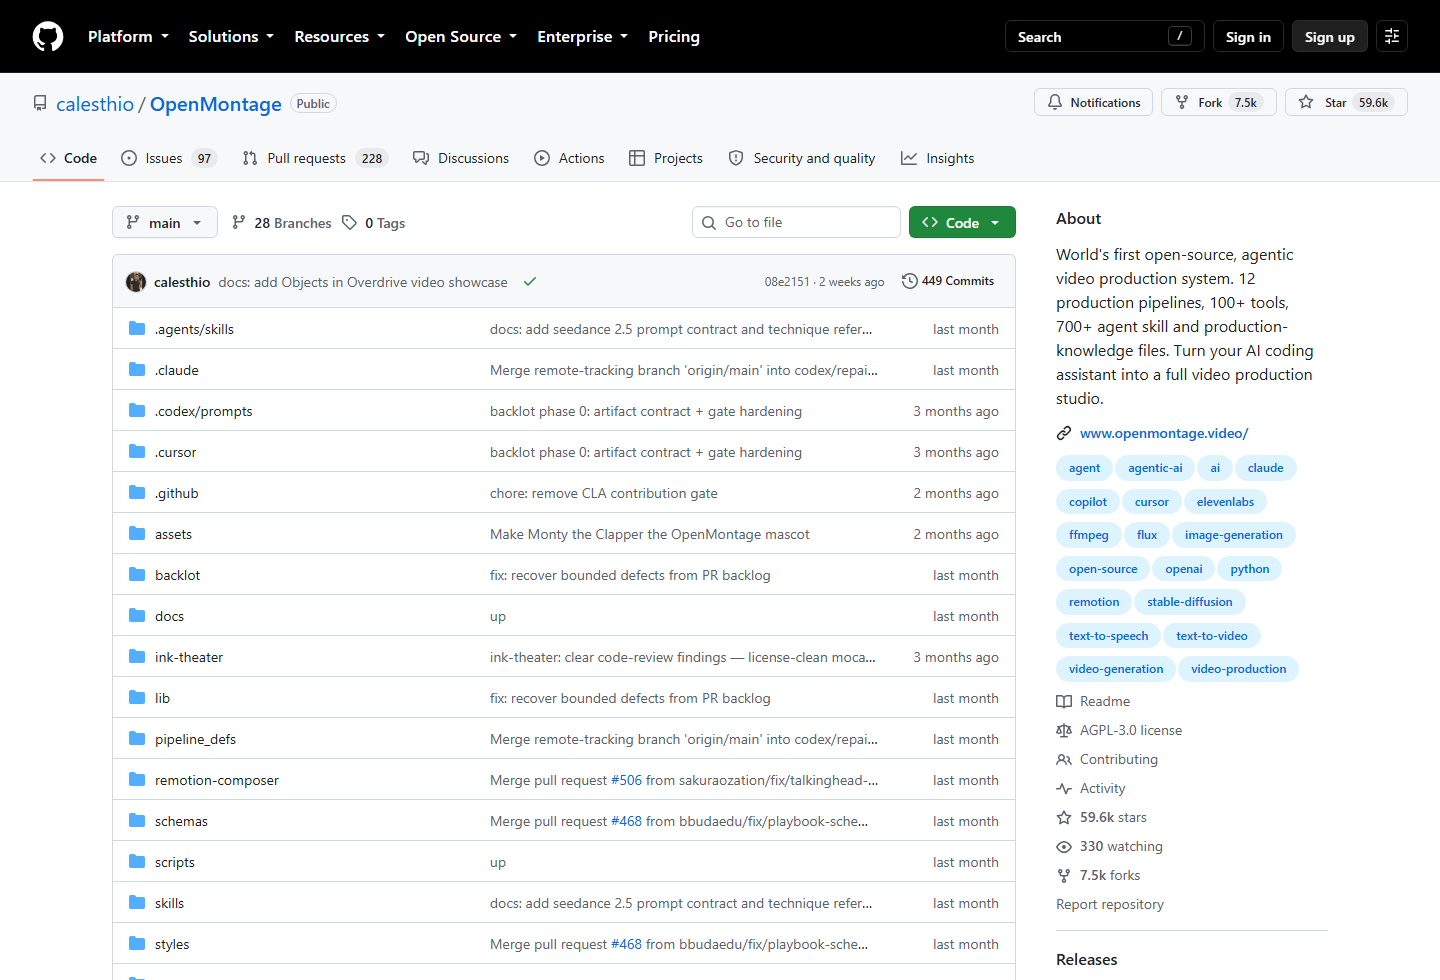
The OpenMontage GitHub repository describes the project as an open-source, agentic video production system with 12 production pipelines, 100+ tools, and 700+ agent skill and production-knowledge files. That makes it more like a production framework for AI coding assistants than a simple one-click video editor.
The project can help with research, scripting, asset generation, footage retrieval, editing, composition, captions, and final rendering. But the creator still owns the brief, the approval process, the copyright checks, and the final decision to publish.
Best choice by use case
- Best for AI builders: testing how agentic workflows can run a repeatable video production pipeline.
- Best for creators: producing a first draft from one idea, then reviewing the script, visuals, and edit.
- Best for YouTube experiments: short explainers, documentary-style clips, motion showcases, and proof-of-concept videos.
- Not ideal for: users who want a simple browser editor with no local setup, no command line, and no provider configuration.
OpenMontage at a glance
| Tool | Best for | AI/workflow strength | Learning curve | Pricing note | Human review risk |
|---|---|---|---|---|---|
| OpenMontage | Creators and builders who want an open-source AI video production pipeline | Strong for script, storyboard, asset, voice, composition, render, and agent workflow orchestration | Medium to advanced | Open-source under AGPL-3.0; provider APIs, generated media, and cloud models may still cost money | High if users publish without checking claims, licensing, voice, visuals, music, captions, and final quality |
Before you install OpenMontage
- Use the official repository: clone only from calesthio/OpenMontage on GitHub.
- Prepare your machine: the README lists Python 3.10+, FFmpeg, Node.js 18+, and an AI coding assistant.
- Expect command-line work: this is not a normal drag-and-drop video editor.
- Start small: test a 30-60 second video before asking it to produce a longer YouTube video.
- Check licensing: the GitHub API reports AGPL-3.0 for the project, and media providers may have their own usage rules.
Step-by-step OpenMontage setup
1. Install the prerequisites
Install the base tools first. On Windows, use PowerShell or Windows Terminal. On macOS or Linux, use your normal package manager. The important part is that Python, Node.js, FFmpeg, and Git are available from your terminal.
2. Clone the official repository
Open a terminal in the folder where you keep projects, then clone OpenMontage from GitHub.
git clone https://github.com/calesthio/OpenMontage.git
cd OpenMontage
3. Run the normal setup path
If your system has make available, the official quick start uses this command:
make setupThis is the cleanest route because it lets the project install the expected Python and Node dependencies together.
4. Use the Windows PowerShell fallback if needed
If make is not available on Windows, the README provides a manual PowerShell path. Run it from inside the OpenMontage folder.
py -3 -m venv .venv
.\.venv\Scripts\Activate.ps1
python -m pip install -r requirements.txt
cd remotion-composer
npm install
cd ..
python -m pip install piper-tts
Copy-Item .env.example .env
The README also notes that if npm install fails with ERR_INVALID_ARG_TYPE on Windows, try this inside the relevant Node project folder:
npx --yes npm install5. Use the macOS/Linux fallback if needed
On macOS or Linux, the manual route is similar but uses a shell virtual environment activation command.
python3 -m venv .venv
source .venv/bin/activate
python -m pip install -r requirements.txt
cd remotion-composer
npm install
cd ..
python -m pip install piper-tts
cp .env.example .env
6. Add only the API keys you need
OpenMontage can work with many providers, but you do not need to add every key at the start. Begin with the providers you understand and can afford. For a first test, focus on the minimum path needed for your video idea, then expand later.
Useful provider categories include image generation, video generation, stock footage, stock images, music, text-to-speech, and model gateways. Keep keys private, never paste them into public prompts, and do not commit your .env file.
7. Open the project in your AI coding assistant
Open the OpenMontage folder in your coding assistant. The README says it can work with Claude Code, Cursor, Copilot, Windsurf, Codex, or any assistant that can read files and run code. Ask the assistant to read the project guide before generating anything.
Read AGENT_GUIDE.md and PROJECT_CONTEXT.md first. Then help me create a 45-second YouTube explainer using the OpenMontage pipeline.8. Give it one clear YouTube idea
A good first prompt should be narrow. Do not start with “make me a viral channel.” Start with one video, one audience, one length, and one measurable output.
Make a 45-second YouTube explainer about how AI agents help small teams create videos. Use a practical tone, simple narration, clear captions, and a clean storyboard. Show me the script and scene plan before rendering.9. Review before rendering and publishing
This is the step most people skip. Before rendering, review the script, storyboard, visuals, voice, music, captions, source links, and cost notes. After rendering, watch the video on desktop and mobile, then check whether the final result actually matches the brief.
What a safe OpenMontage workflow looks like
- Brief: define topic, audience, platform, length, tone, and must-have points.
- Plan: ask OpenMontage to create the script and storyboard first.
- Approve: review the hook, claims, scenes, asset sources, and estimated provider costs.
- Generate: let the pipeline create or retrieve visuals, narration, music, and captions.
- Edit: inspect pacing, transitions, scene order, captions, and audio levels.
- Render: create the final export only after the draft passes review.
- Publish: upload only after checking rights, factual claims, and platform format.
Practical prompt template
Use this kind of prompt when you want the system to make decisions without guessing too much:
Create a 60-second YouTube video about [topic] for [audience].
Goal: [what the viewer should understand or do].
Tone: practical, clear, not hype.
Structure: hook, problem, explanation, example, takeaway.
Assets: use only safe stock footage or generated visuals; show me sources and costs.
Approval: stop after script and storyboard before generating final assets.
Output: 16:9 video, captions, voiceover, music, and final render after approval.
Limitations and risks
- Setup complexity: OpenMontage is powerful, but it expects local tools, dependencies, and command-line comfort.
- Provider costs: open source does not mean every generated image, video, voice, or song is free.
- Copyright risk: review stock footage, music, logos, faces, voices, and generated media rights.
- Factual accuracy: scripts and captions still need human checking.
- Brand quality: the final video may be technically complete but still need stronger pacing, voice, or visual taste.
- Security: do not paste private API keys into chat, screenshots, Git commits, or public issue threads.
Official sources
- OpenMontage GitHub repository
- OpenMontage Quick Start
- OpenMontage Agent Guide
- OpenMontage Project Context
- Python
- FFmpeg
- Node.js
Related Techmixer guides
- AI Tools
- Open Source
- Software Guides
- Vizard Agent AI Video Editing
- Best No-Code AI Workflow Automation Tools for Small Teams
- Top AI Productivity Tools for Business and Entrepreneurs
FAQ
What is OpenMontage?
OpenMontage is an open-source agentic video production system that helps an AI coding assistant plan, script, source assets, compose, and render video projects.
Can OpenMontage make a full YouTube video by itself?
It can automate many production stages, but creators should still review the script, sources, visuals, voiceover, licensing, factual claims, and final render before publishing.
Do I need API keys to use OpenMontage?
The repository says API keys are optional, but more provider keys unlock more image, video, voice, music, and stock-media tools.
Does OpenMontage work on Windows?
The README includes Windows PowerShell fallback commands, but users still need Python, Node.js, FFmpeg, and a coding assistant that can run the project safely.
Is OpenMontage free?
The project is open source under AGPL-3.0, but generated media, API providers, cloud inference, and optional models may still create usage costs.
Our take
OpenMontage is worth testing because it treats video creation as a production pipeline, not a single prompt trick. For Techmixer readers, the best use is a controlled experiment: install it locally, run one short YouTube idea, approve the storyboard before assets are generated, and keep human review in the loop. The tool is exciting, but publishing without checking sources, rights, and final quality would be the wrong workflow.
Last reviewed: 17 September 2026.