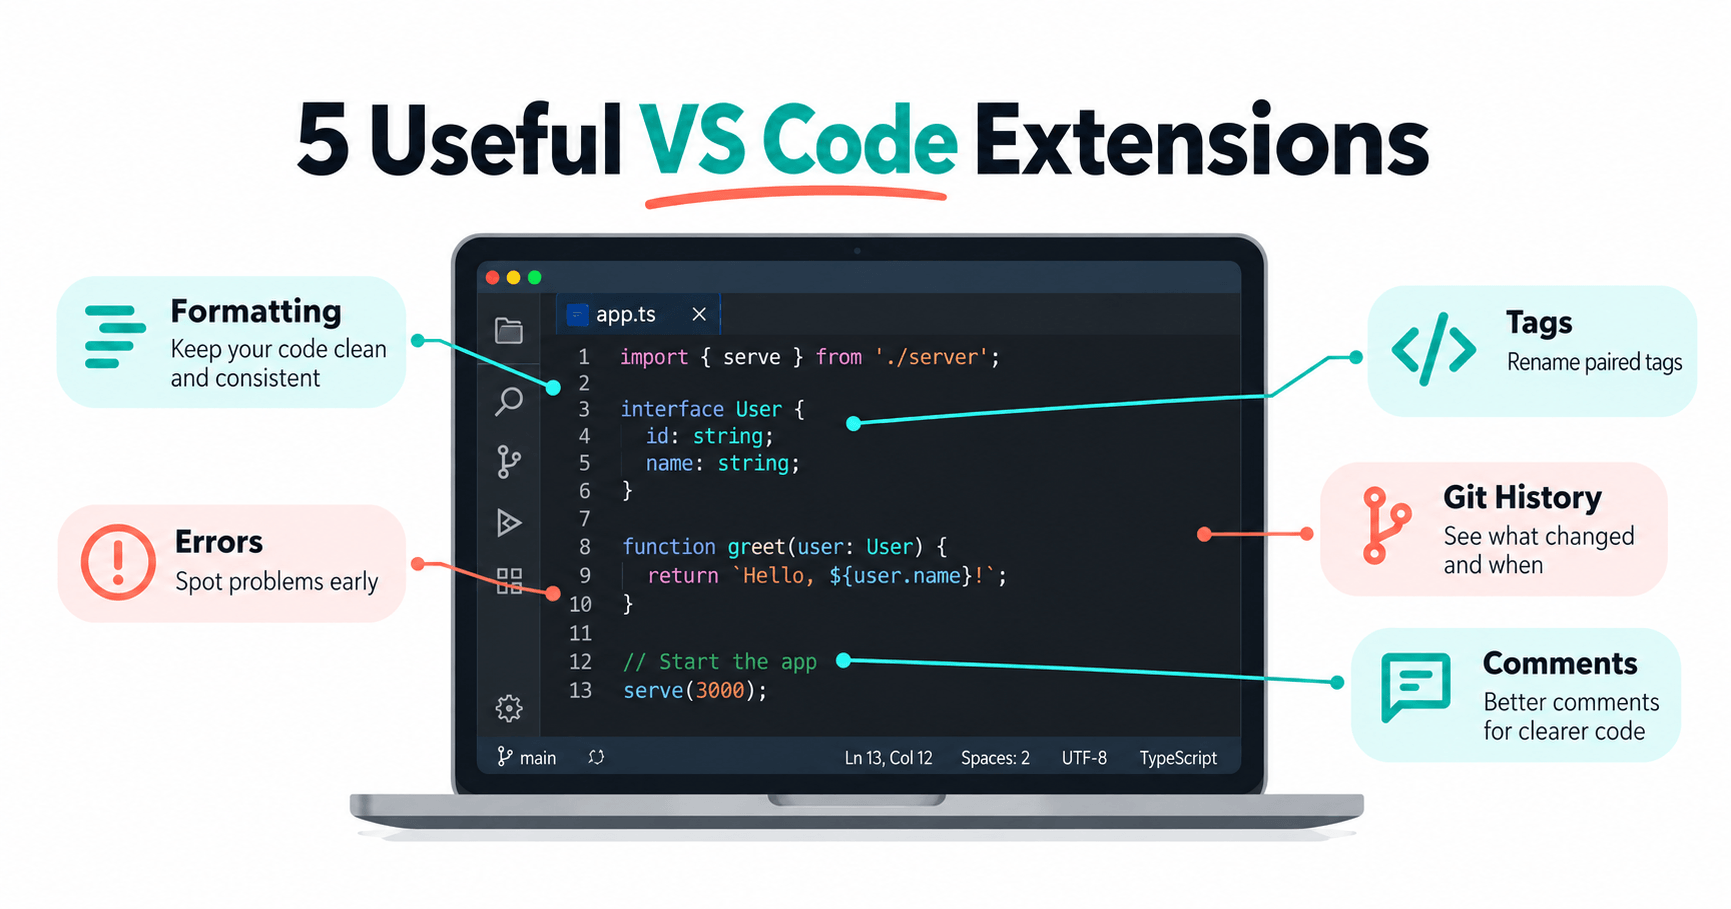
Useful VS Code extensions should remove a recurring annoyance, not just fill your sidebar. Prettier handles consistent formatting, Error Lens makes diagnostics easier to notice, Auto Rename Tag helps with paired tags, GitLens adds Git history context, and Better Comments highlights notes. You probably do not need all five: start with your biggest friction point and check what VS Code already does.
Quick Answer
For JavaScript or web projects without an agreed formatter, start with Prettier. Add Error Lens if you miss warnings, and GitLens if you often investigate existing code. Try built-in linked editing before installing Auto Rename Tag for HTML. Better Comments is an optional readability aid, not a substitute for tests or an issue tracker.
What to Know First
These are editor extensions, not AI coding agents. They help you read, format and understand code; none proves that a program is correct. A tidy file can still contain a serious bug.
Use the desktop edition of VS Code and a small practice folder first. Install the language tooling your project needs, and use a Git repository with some history if you want to evaluate GitLens. If you have not installed the editor, start with our VS Code installation guide for Linux and macOS.
Before editing settings, read any existing .vscode/settings.json, formatter configuration and contributor instructions. Merge individual settings; do not replace a team’s configuration with a copied block. Use version control or a backup so a formatting experiment is easy to undo.
Only install the matching publisher’s listing. An extension name is not enough to distinguish lookalikes. Review trust prompts and the project’s policy before enabling an extension in a work repository. Microsoft’s extension installation documentation explains the Marketplace workflow.
Compare These 5 VS Code Extensions
| Extension | Best for | Workflow benefit | Setup | Cost or limit | What still needs review |
|---|---|---|---|---|---|
| Prettier | Consistent formatting | Formats supported files | Choose a default formatter | Free | Diffs, syntax and project rules |
| Error Lens | Visible diagnostics | Moves diagnostic messages onto lines | Low; language tooling still needed | Free | Underlying diagnostic accuracy |
| Auto Rename Tag | Paired tag edits | Updates matching tags | Low; scope by language | Free; HTML has a built-in alternative | Resulting markup and nested tags |
| GitLens | Understanding Git history | Shows blame and revision context | Low for basic history; more for advanced views | Free Community; some advanced features need an account or Pro | Commit context, privacy and plan limits |
| Better Comments | Spotting important notes | Colors supported comment markers | Low | Free | Whether notes are correct and actionable |
This is a task-based shortlist, not a benchmark ranking. More extensions can mean more configuration to maintain. The installation steps below are documentation-based; only the Prettier browser example was exercised for this guide.
How to Install the Right Extension
- Open VS Code’s Extensions view. On Windows and Linux, use
Ctrl+Shift+X; on macOS, useCmd+Shift+X. - Search by the exact identifier shown in each section, for example
@id:esbenp.prettier-vscode. - Check the publisher and read the listing, then choose Install if it matches your project’s requirements.
- Follow any reload prompt. Open a supported file and try the small check in that extension’s section.
- Keep it only if the result helps. You can disable an extension for a particular workspace rather than removing it everywhere.
Install one at a time. If behavior changes unexpectedly, it is much easier to identify the cause than after installing a complete extension pack.
1. Prettier: Keep Formatting Consistent
Best for: web developers who want predictable spacing and line wrapping across supported file types. Publisher: Prettier. Identifier: esbenp.prettier-vscode.
Prettier formats code according to configuration. Its VS Code extension can use a project’s local Prettier installation, which helps teammates use the same version. See the official Prettier extension listing.

Set up Prettier without changing every file
- Install the verified extension and open a supported file, such as
example.js. - Run Format Document With… from the Command Palette and select Prettier. Check the result before enabling automatic formatting.
- For JavaScript only, merge this example into your workspace settings:
{
  "[javascript]": {
    "editor.defaultFormatter": "esbenp.prettier-vscode",
    "editor.formatOnSave": true
  }
}
Use separate language blocks if your project also needs TypeScript or JSON. Do not enable a global formatter simply because this example works for one JavaScript file.
Practical example: a small object written on one cramped line becomes easier to scan after formatting. In the captured browser example, Prettier adjusted spacing and expanded a function. That demonstrates formatting, not a performance improvement or a VS Code installation test.
Limitation: Prettier is not a repair tool for broken syntax. A parse error must be corrected before formatting can complete. Review the diff after a first save: a whole-file formatting change can obscure the few lines you actually intended to edit. Follow existing project configuration rather than introducing your personal style into a shared codebase.
2. Error Lens: Notice Problems Where You Edit
Best for: readers who overlook a warning in the Problems panel while concentrating on a file. Publisher: Alexander. Identifier: usernamehw.errorlens.
Error Lens displays diagnostic messages beside the affected lines and can highlight those lines. It surfaces diagnostics supplied by VS Code, language tooling or linters; it does not independently establish which bugs exist. The official Error Lens listing documents its display controls.

Try Error Lens with a small diagnostic
- Install Error Lens and open a file whose language service is active.
- In a disposable JavaScript example, add an incomplete expression such as
const total = ;. - Check the Problems panel first, then confirm that Error Lens displays that diagnostic near the line.
- Correct the expression and confirm that the message disappears. Do not leave intentionally broken code in your real project.
Where it helps: during a focused edit, an inline message can make a missed syntax error obvious without constantly switching panels. In a large file with many warnings, however, the extra text can become distracting.
If you only want higher-priority messages, consider this workspace setting:
{
  "errorLens.enabledDiagnosticLevels": ["error", "warning"]
}
Limitation: no inline message does not mean no bugs. If a diagnostic is absent from the Problems panel too, investigate the language service or linter rather than assuming Error Lens failed. Keep tests and normal review in your workflow.
3. Auto Rename Tag: Keep Paired Tags Together
Best for: markup workflows where paired tag edits are tedious and built-in support does not meet your needs. Publisher: Jun Han. Identifier: formulahendry.auto-rename-tag.
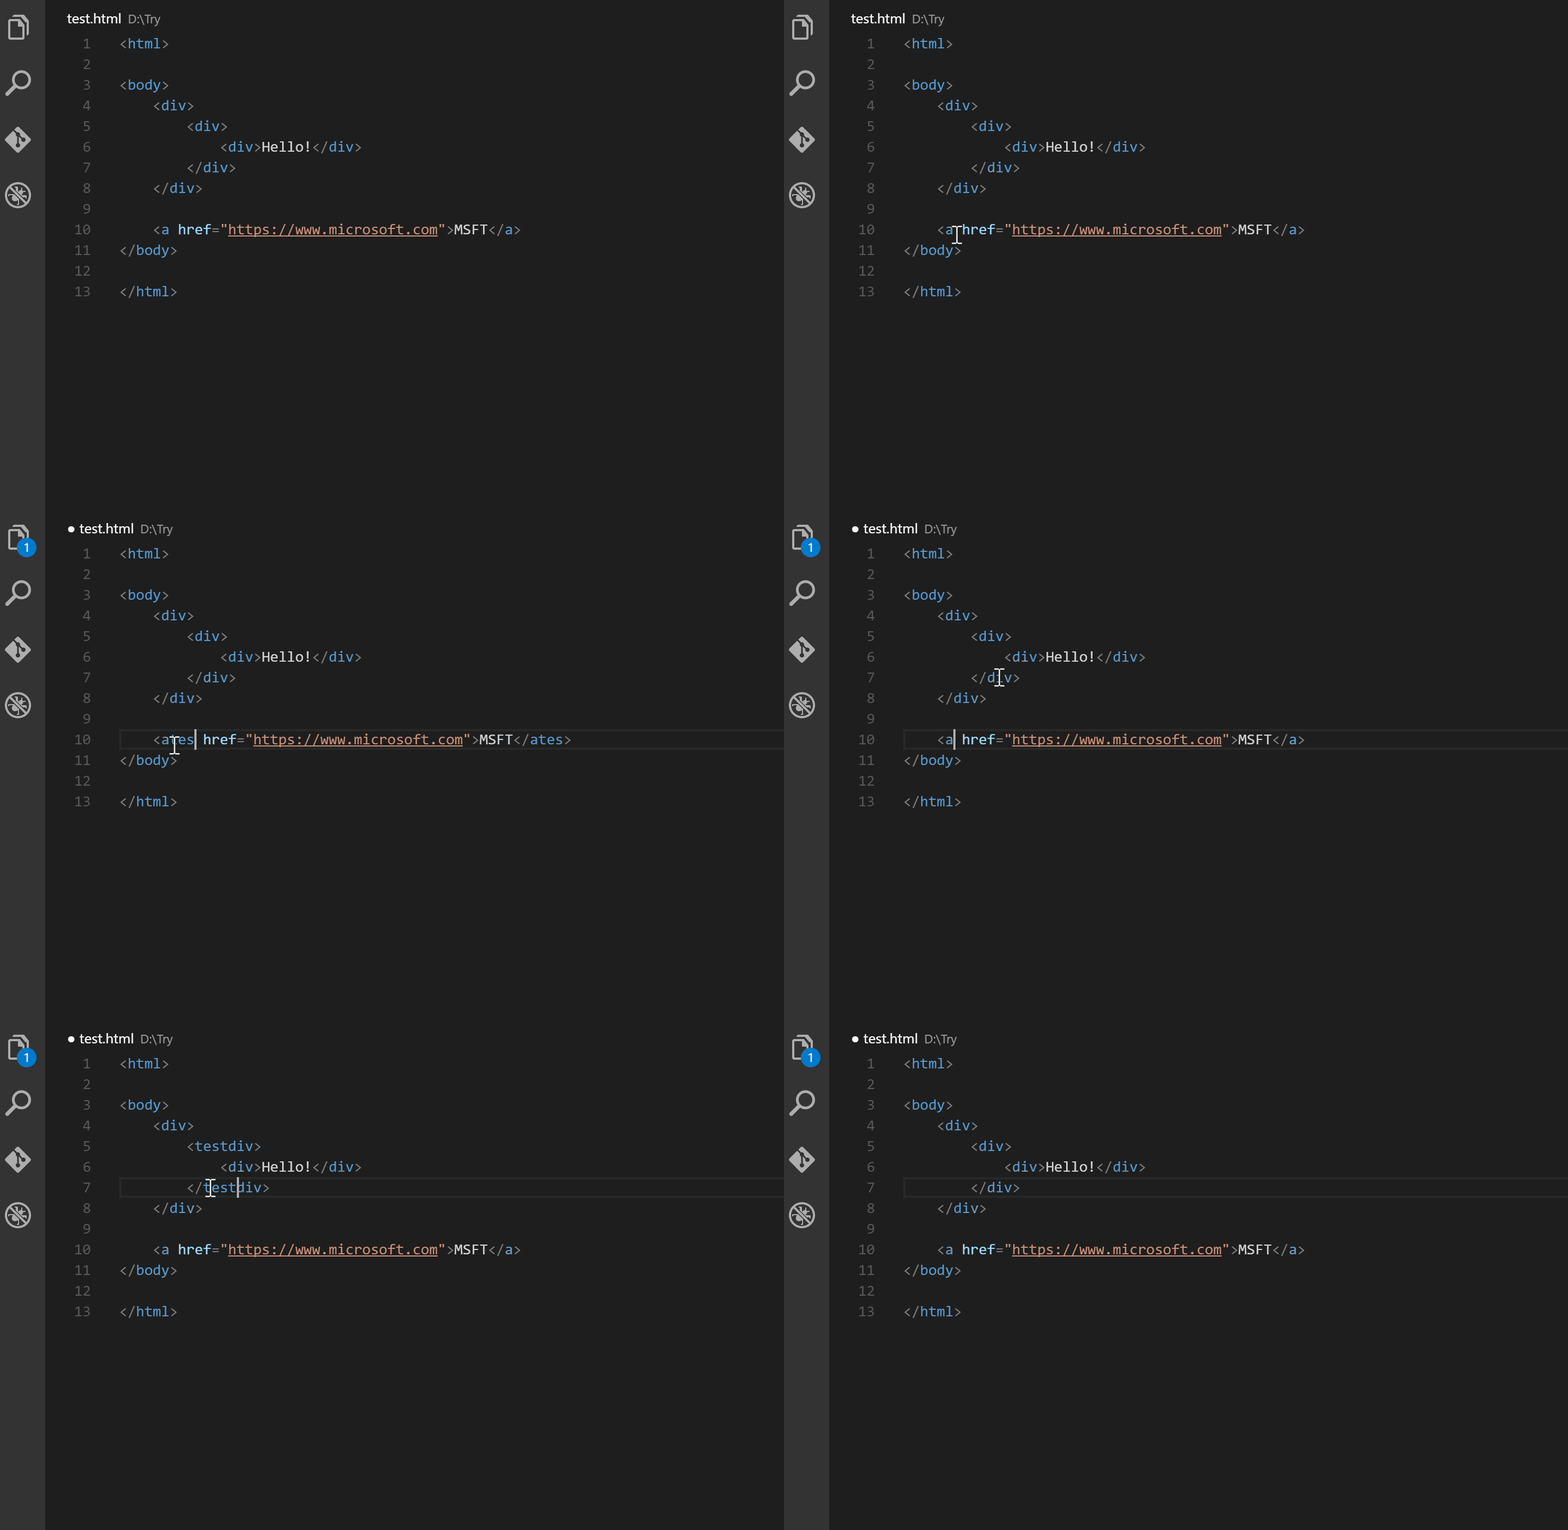
Auto Rename Tag updates a matching tag when you rename its partner. But HTML users should try "editor.linkedEditing": true first: Microsoft documents built-in linked editing for HTML. The extension’s official listing also explains that enabled built-in linked editing takes precedence for HTML and Handlebars.
Check the built-in option, then test an extension if needed
- For HTML, enable linked editing in settings and open a practice file with
<div>Example</div>. - Change the opening tag name to
section. Check whether the closing tag follows. - If you work in another relevant language, evaluate Auto Rename Tag there instead of assuming the HTML result applies everywhere.
- After installing it, test one simple pair, then a nested example. Confirm the file’s language mode.
Where it helps: changing several layout wrappers is less error-prone when the partner tag follows. That does not mean the new element is semantically correct or that the page remains accessible.
Limitation: if edits behave unexpectedly, check both linked editing and other tag extensions. Avoid installing several tools for the same operation. For a simple HTML-only workflow, the built-in feature may be all you need; skipping an extension is a valid outcome.
4. GitLens: Understand Why Code Changed
Best for: developers reading a repository with meaningful commit history. Publisher: GitKraken. Identifier: eamodio.gitlens.
GitLens adds inline blame and history context. Its Community features are free; advanced features have separate limits. The Commit Graph shown below is available for public repositories with a free GitKraken account, while advanced private-repository features can require Pro. Check the official GitLens feature breakdown before relying on a trial feature.
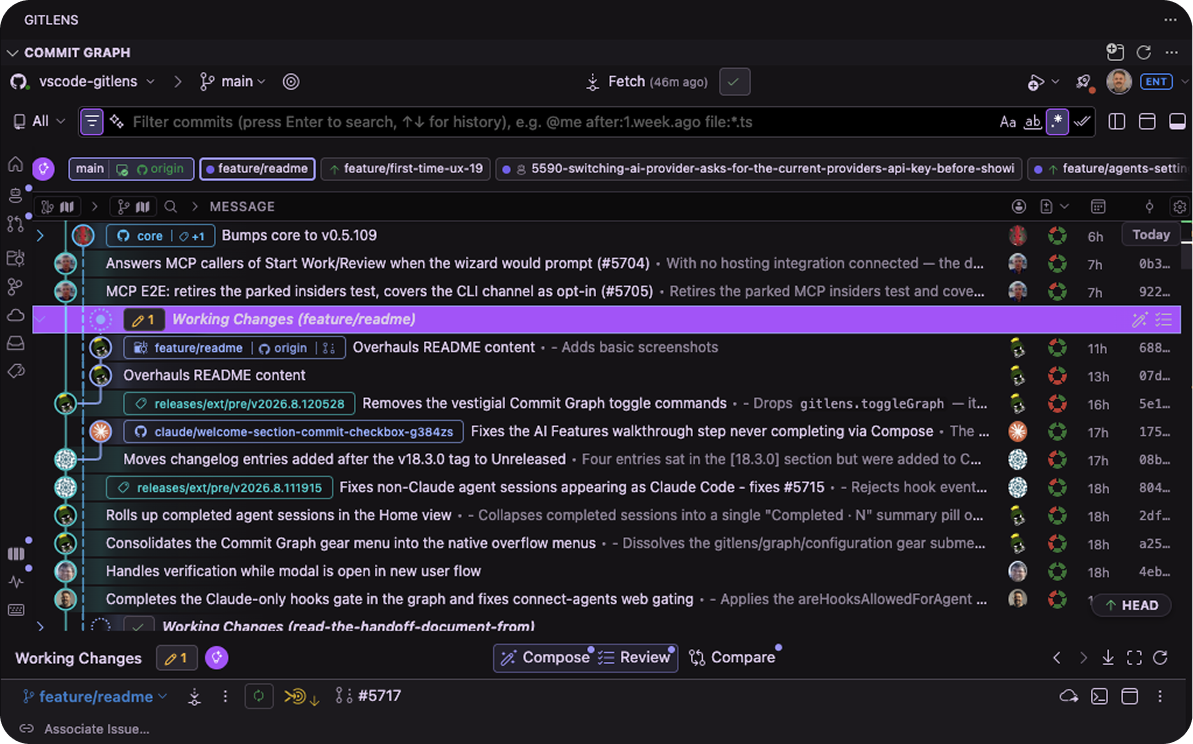
Use GitLens for one real question
- Open a local Git repository with existing commits. An empty folder cannot demonstrate useful history.
- Install GitLens and inspect a line’s blame information.
- Open the relevant commit or revision and read the surrounding diff, not just the author’s name.
- Compare the previous implementation with the current one. Ask what behavior changed and whether the commit explains why.
Practical example: a timeout value looks unusually high. History may show that someone increased it after a service started responding slowly. That context is more useful than immediately replacing the number with a familiar default.
Limitation: the last person to touch a line is not necessarily the person who designed it. A formatting commit can distort blame, and commit messages can be incomplete. Confirm the behavior with code, tests and surrounding changes. For a work repository, review account, hosting-integration and AI-feature policies before connecting external services; basic history exploration is not a reason to upload proprietary code.
5. Better Comments: Make Important Notes Easier to Scan
Best for: teams that already use consistent comment markers. Publisher: Aaron Bond. Identifier: aaron-bond.better-comments.
Better Comments colors supported comments with markers such as !, ? and TODO. Supported languages and tag customization are described in the official Better Comments listing.
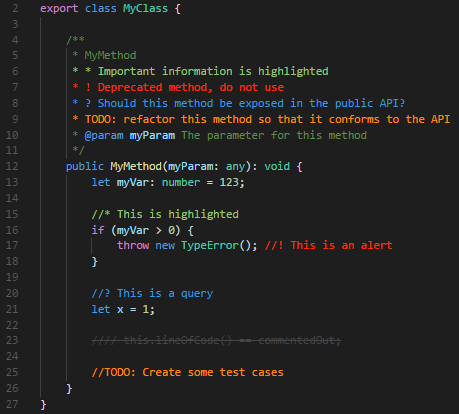
Use comments that say something actionable
- Install the extension and open a supported source file, such as JavaScript.
- Add a few practice comments, using the examples below.
- Check readability with your theme. Customize the tag colors only if the defaults are hard to distinguish.
// ! Do not log access tokens here.
// ? Does this endpoint return a stable sort order?
// TODO: Add a regression test for an empty response.
Where it helps: the markers make intent easier to recognize during a scan. They remain readable text for teammates who do not have the extension, which matters more than choosing attractive colors.
Limitation: colored notes do not assign an owner, a deadline or a test. Move important unfinished work into your issue tracker and link it from the code when useful. Do not put secrets in comments, and do not assume a plain JSON file accepts comments just because a comment-highlighting extension is installed.
Best Choice by Use Case
- You spend time adjusting spacing: evaluate Prettier using the project’s existing formatting rules.
- You miss diagnostics while editing: try Error Lens, then reduce its display noise if necessary.
- You edit HTML tag pairs: start with VS Code’s linked editing; add Auto Rename Tag only for an unmet need.
- You inherit unfamiliar code: GitLens is the most relevant option when useful Git history exists.
- You lose important notes in long files: try Better Comments, but keep tracking real work outside comments.
For a beginner, one formatter and functioning language diagnostics are a better starting point than installing every item here. For an experienced developer in a mature repository, existing team conventions should decide the setup.
A Practical Workflow Without Extension Overload
Take one small task, such as changing a card component. Read its history if the behavior is unclear. Edit the component, review diagnostics, format the file according to the project rules, and inspect the diff. Then run the relevant tests or preview the page. A useful extension supports one of those steps; it does not replace the final check.
Keep a small record of why you installed each extension. If you cannot name the job it performs, disable it for a week. Notice whether you miss it before reinstalling it everywhere. This is a decision exercise, not a claim that any of these extensions is slow.
What if a new extension causes trouble?
Disable the newest extension in the affected workspace and repeat the same edit. For formatting trouble, check the selected formatter, file language and project configuration. For diagnostics, check the Problems panel and language tooling. For tag edits, check built-in linked editing and overlapping extensions. Restore the earlier settings if the experiment does not help.
Stop changing unrelated settings when the behavior is no longer reproducible. Keep the smallest example that shows the issue, record the editor and extension versions, and consult the project’s official issue tracker. A focused reproduction is more useful than a long list of random configuration changes.
FAQ
Can I use these extensions without an AI subscription?
Yes. The formatting, diagnostic display, tag editing and comment highlighting described here do not require an AI subscription. GitLens basic Community history features are free, but advanced features have account and plan limits. You do not need to enable AI features for this workflow.
Do I need Node.js to install the Prettier extension?
Not just to install the editor extension and use its bundled formatter. A project-local Prettier setup is a separate dependency-management choice. Follow the repository instructions before adding packages or changing its formatter version.
Should I install all five VS Code extensions at once?
No. Try one extension for one recurring task, check its behavior in a practice file and keep it only if useful. Built-in HTML linked editing can remove the need for a separate tag extension.
Can I share this setup with a teammate?
Yes, but agree on project settings first. Share the exact extension identifiers and explain which settings are project requirements versus personal preferences. Do not overwrite existing workspace configuration or assume your theme makes comment colors readable for everyone.
Related Techmixer Guides
- Software guides for choosing and setting up practical tools.
- Fix guides when installation or configuration fails.
- Windows SSH clients for a separate remote-access workflow.
- Free FTP and SFTP software when you need to transfer project files.
- Learn AI engineering from scratch if you want a project to practice with your editor.
Our Take
The best extension setup is the smallest one that solves your actual editing problems. Prettier and visible diagnostics are sensible starting points for many web projects; GitLens is valuable when history matters. Auto Rename Tag and Better Comments are more dependent on your language and habits. Neither a colorful editor nor a large extension collection is evidence of better code.
Last reviewed: 8 October 2026. Techmixer checked the official extension listings and Microsoft documentation and exercised the illustrated Prettier example in its browser playground. The other screenshots are official upstream demonstrations, not Techmixer installation tests. We did not install this five-extension setup or run performance benchmarks.