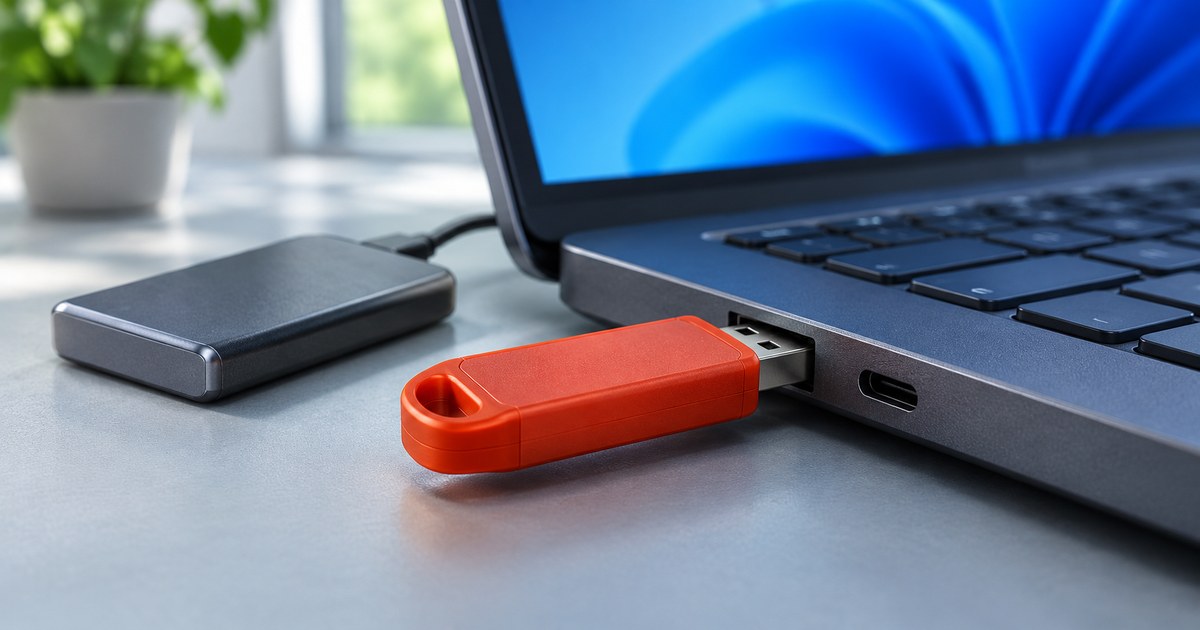
A Windows rescue USB lets you start a PC from a flash drive and open repair tools even when Windows 11 won’t load. Make a Microsoft installation USB first. It can open the Windows Recovery Environment (WinRE), where you can try Startup Repair, remove a recent update, or restore system settings. Add a separate rescue drive if you need to copy files or diagnose storage before repairing Windows.
What to check before you start
- Find the BitLocker recovery key. Keep it available from another device. If the PC belongs to work or school, ask IT where the key is stored. A rescue USB doesn’t unlock an encrypted drive. Microsoft’s BitLocker key guide.
- Use an empty USB drive. Microsoft specifies at least 8 GB for Windows 11 installation media. Creating the media erases the selected drive. Check the drive letter and capacity before confirming. Windows 11 download and media requirements.
- Have somewhere to copy files. Keep a separate external drive handy. If files are irreplaceable and the internal drive is clicking, dropping offline, or reporting read errors, stop before repeated repair attempts. Consider professional recovery for data that has no backup.
How to make and use a Windows rescue USB in 4 steps
1. Create the USB on a working PC
Open Microsoft’s Windows 11 download page and choose Create Windows 11 Installation Media. Run the tool, choose USB flash drive when prompted, and select the empty drive. Wait for the tool to finish and label the drive. The Media Creation Tool builds x64 media. For an Arm-based PC, use that model’s recovery instructions and the matching architecture.
2. Start the problem PC from the USB
Connect the USB and open the PC’s one-time boot menu at power-on. Check the manufacturer’s instructions for the key, then choose the USB’s UEFI entry if one is offered on a UEFI PC. If the PC starts from its internal drive again, try another built-in USB port and confirm that the flash drive appears in the boot menu. On a managed PC, ask IT if USB boot is restricted.
3. Choose Repair my PC
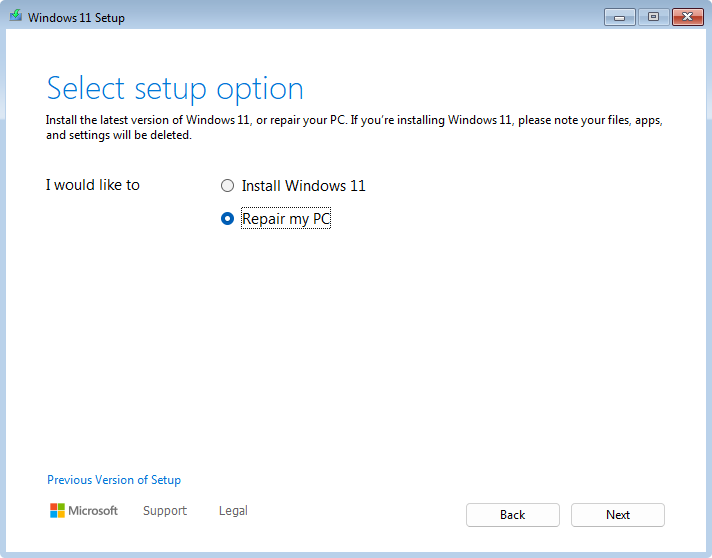
When Windows Setup appears, select the language and keyboard options, then choose Repair my PC to open WinRE. On older installation media you may see Repair your computer. The success signal is the recovery menu with a Troubleshoot option. Stop if you reach a screen asking where to install Windows or which partitions to delete. Microsoft’s illustrated WinRE walkthrough.
4. Pick the repair that matches the symptom
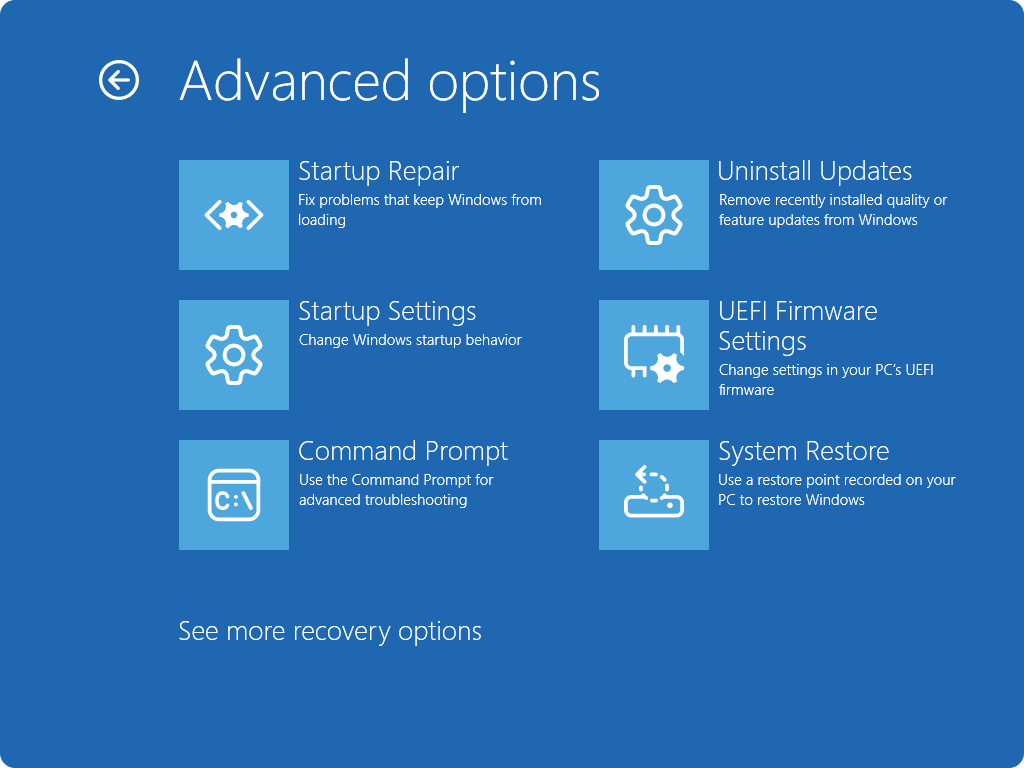
Go to Troubleshoot ? Advanced options. Choose Startup Repair if Windows suddenly stopped starting and the drive is visible. If the trouble started immediately after Windows Update, try Uninstall Updates. If a driver or app change caused the problem and a restore point exists, try System Restore. System Restore rolls back system files and settings and can undo recent app or driver changes. Microsoft’s Startup Repair instructions.
After a repair, boot from the internal drive and confirm that you can sign in and open a file. If Startup Repair reports that it couldn’t fix the PC, write down the message. Back up anything you can still access before considering a reset or clean install.
When to use a different rescue drive
Windows Recovery Drive for a PC you still have access to. Open Start, search for Recovery Drive, and check Back up system files to the recovery drive if you want the media to support a full recovery. Follow the wizard with an empty USB. Make it on the PC you intend to recover and keep personal file backups elsewhere. In WinRE, choosing Recover from a drive starts a reinstall workflow, so stop at the menu when rehearsing. Microsoft’s Recovery Drive instructions.
How to make a Windows rescue USB with Ventoy
Use Ventoy if you want a boot menu for several ISO images. A practical starter kit is the Windows 11 ISO for Startup Repair and the SystemRescue ISO for storage diagnostics or copying files. Keep a separate Microsoft installation USB if the PC is picky about what it will boot.
- On a working Windows PC, download the Windows ZIP from Ventoy’s download page and extract it. Download the Windows 11 disk image (ISO) and the SystemRescue amd64 ISO from their official sites.
- Plug in an empty flash drive with room for both ISOs. Disconnect other removable drives. Open
Ventoy2Disk.exe, match the target device by capacity and drive letter, and choose Install. This erases the selected USB. Check the target again before accepting the confirmation. - Open the large Ventoy partition in File Explorer. Copy the two
.isofiles there as ordinary files. Leave the small boot partition alone. Wait for the copy to finish before ejecting the drive. - Use the target PC’s one-time boot menu and choose the Ventoy USB. Both ISO names should appear. Open the Windows ISO and verify that you can reach Repair my PC, then restart and select SystemRescue. Seeing the ISO names confirms Ventoy can read the files. Booting each image confirms it works on that PC.
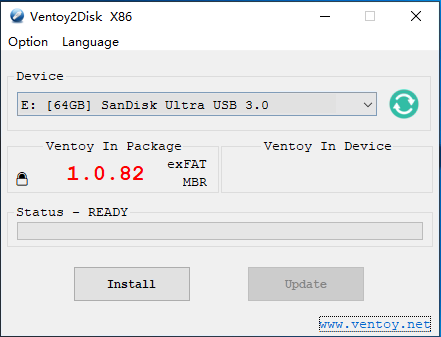
If an ISO is missing, check that you copied the complete file to the large Ventoy partition. If the PC rejects the USB before the menu loads, keep its Secure Boot settings intact and use the direct Microsoft stick for Windows repair. On a managed machine, check with IT before changing the boot configuration. Ventoy setup guide · Ventoy Secure Boot notes.
How to make a dedicated SystemRescue USB with Rufus
Use a dedicated SystemRescue USB if you mainly want to inspect disks or copy files. These steps are for a typical Intel or AMD 64-bit Windows PC.
- Download the SystemRescue ISO and its SHA256 checksum. In PowerShell, run
Get-FileHash -Algorithm SHA256followed by the quoted path to the ISO. Compare the full hash with the project’s SHA256 value. Download it again from the official source if they differ. - Open Rufus and select a separate empty USB in Device. Choose the SystemRescue ISO. The project’s Windows instructions specify MBR, BIOS or UEFI, and FAT32. Leave the version-specific
RESCUE…volume label that Rufus fills in. Click Start after confirming the target and choose ISO image mode if prompted. - Boot from the USB and choose the default SystemRescue entry. A shell prompt means the live environment has loaded. Type
startxif you want its graphical desktop. Keep the USB connected during the session. If the PC blocks it under Secure Boot, keep the firmware configuration intact and use an approved recovery option for that machine.
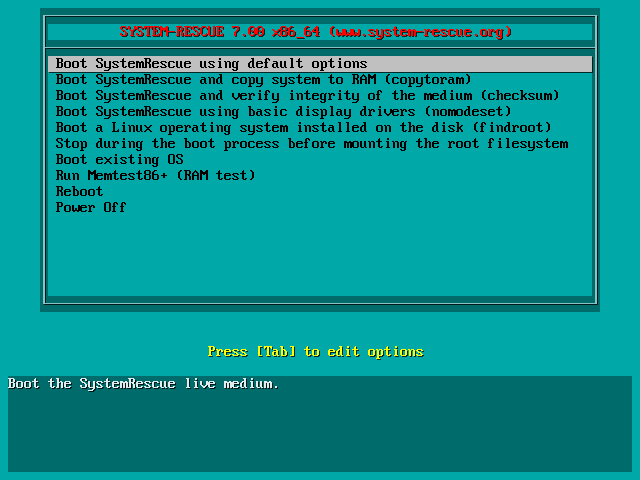
If the goal is to save files, identify the Windows volume and the backup drive by size, label, and filesystem before opening either one. Mount the source read-only when it is a readable, unencrypted NTFS volume. Copy a few files to the separate backup drive and open the copies from that drive to check them. If you hit BitLocker or recurring read errors, pause and deal with the key or drive condition before attempting repairs. SystemRescue’s Rufus instructions · Read-only NTFS instructions · Techmixer’s SystemRescue guide.
What if the rescue USB can’t see your SSD?
Look for the SSD in the PC’s UEFI firmware. If it’s missing there too, pause software repairs and run the manufacturer’s hardware diagnostics. If the firmware sees it but Windows Setup doesn’t, check the PC maker’s recovery instructions for the storage controller driver. Avoid changing storage modes or accepting an offer to initialize the disk while you’re trying to preserve its contents.
Related Techmixer guides
- What to do when Windows says BOOTMGR is missing
- Five mistakes to avoid when recovering a drive
- Disk cloning tools for a planned SSD upgrade
- Browse more Techmixer Fix Guides
Our take
Make the Microsoft USB while your PC still works. Boot it once, reach Advanced options, then exit without running a repair. That rehearsal verifies that the PC can start from the USB and gives you time to find the BitLocker key. Add a second drive with SystemRescue or Ventoy if you have a specific job for it.
Last reviewed November 17, 2026. Techmixer reviewed the official instructions and used Microsoft’s interface screenshots. The Ventoy and SystemRescue images are examples from the projects’ documentation. These procedures were reviewed against the official instructions. A physical USB boot test is still pending.